
Pre-Charging an inverter
NOTE: This article is relevant only for batteries prior to SMART4 / SMART5. If you have a SMART4 / SMART5 or HOME battery, please consult the manual on the startup procedure to make use of the built in pre-charge system.
Warning
Before connecting an inverter to your electrical system, disconnect or isolate your battery. Avoid live electrical work, even on low voltage systems, and use insulated tools for safety.
Explanation & Process
Why do I need to pre-charge?
When power is first applied to a capacitive load (like an inverter), a large inrush current is induced. This current creates an arc between the contacts of isolators, fuses, and BMS components which are driven into overcurrent, which can severely damage lithium batteries. For that reason, Roamer batteries are fitted with Short Circuit protection which will block the inrush current. However, this will prevent you from filling the capacitors and being able to use the inverter – what you will see is repeated BMS shutdowns due to an ASCD fault on SMART2 and SMART3 batteries.
The solution to connecting large capacitive loads is to pre-charge using a controlled current. This should only need to be done on first connection, or if the inverter is left disconnected for a long time and the capacitors lose their charge.
When first connected to a battery those capacitors behave like a short circuit for a very short time (microseconds) – just like connecting together the positive and negative posts of the battery. The short-lived high current going through the short circuit is called “inrush current”.
This sudden high current can damage sensitive electronics and cause damage to battery terminals and cable connections by melting them with the heat it generates.
How do I pre-charge?
Pre-charging can be accomplished in a number of ways, depending on what your particular system has installed.
Wear gloves, and safety glasses when attempting any of the below in case of sparks or hot surfaces. This shouldn't happen, but safety precautions shouldn't be dismissed.
Often within a system installed in a vehicle or marine craft, is to utilise the existing charge sources (solar and DC-DC from the engine's alternator).
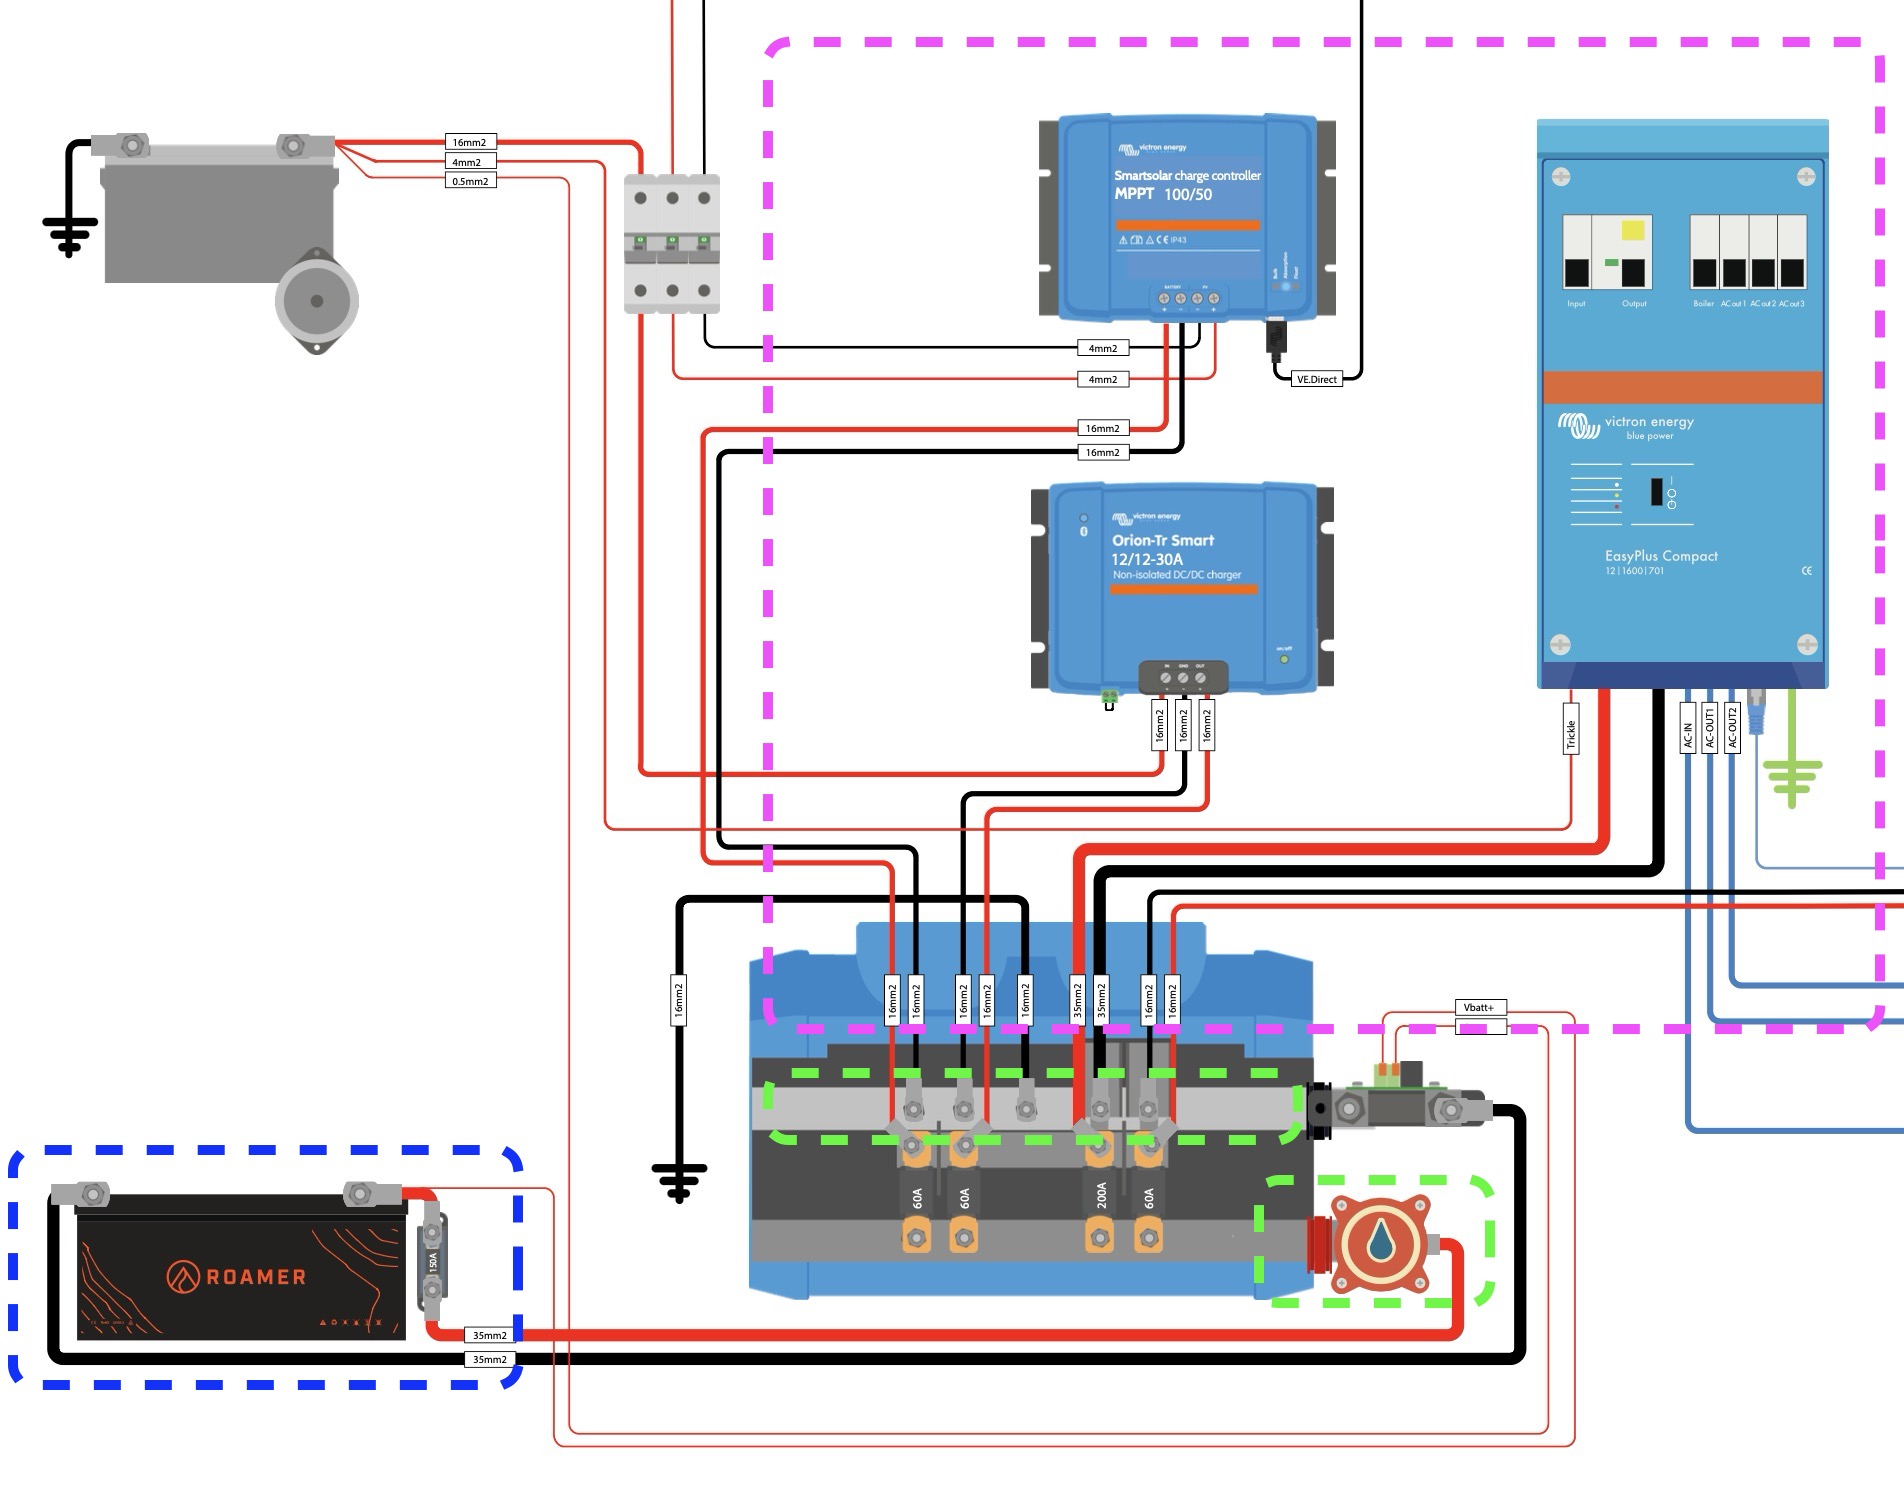
To use these, we expect your inverter to be connected to a busbar along with all of the charge sources and other system loads, where they can remain connected together, with the battery being isolated. See diagram below for reference.
Everything in the purple box is still connected electrically together when the isolator (green box) is turned off, this is because the busbar (long green box) is linking them all together on the other side of the isolator. The battery (blue box) is then left on its own, not electrically connected. (The negative still is, but this doesn't complete a circuit without the isolator being turned on).
But really, how do I pre-charge?
If the above is how your system is setup, then its really simple, just isolate your battery using the switch, start your engine, or get yourself out in the sun. This should power up your 12V system and energise the capacitors in your inverter. Leave it for 2 minutes, or until you see lights on the inverter - (with nothing plugged into the 230V sockets), and then turn on the battery isolator.
Thats it, honestly that easy.
Can I use a mains charger?
Mains chargers can also work. Same as above - Isolate the battery, With the inverter connected to the system, connect the mains charger to the busbars or inverter input, turn the charger on and wait a few minutes. After time is up, you're okay to disconnect and turn the battery isolator back on. Note, this will not work with a Victron Multiplus or other inverter/charger, as the AC input does not trigger a DC charge back to the battery, without voltage present at the DC cabling first. (No battery connected, no charge, no pre-charge).
Can I use a high power resistor?
Yes, this is the traditional way to precharge an inverter. We only mention the charger method first as most people don't usually have a high power resistor to hand! If you do want to carry a resistor with you for this purpose however, we recommend a 100W power resistor (between 10Ω to 20Ω is fine for 12V/24V systems) Disconnect the negative battery cable form the battery terminal. With the inverter connected to the system, hold the resistor onto the cable lug, and press it against the battery terminal for about 30 seconds. Remove the resistor and quickly attach the negative cable to the battery terminal.
How about a lightbulb?
This can be used, car headlight bulbs are recommended, and they should match the voltage rating of your system. Using a 5V interior light bulb will likely just damage the bulb.
Disconnect the negative cable from your battery. With the inverter connected to the system, hold one terminal of the lightbulb to the negative cable and then hold the other terminal against the negative battery terminal. The bulb will light up (hopefully) and will stay lit until it starts to dim slowly, when the bulb goes out completely, the pre-charge is complete and you can quickly attach the negative battery cable.