
Setting up a MultiPlus / EasyPlus / EasySolar for a Roamer LiFePO4 lithium battery with VictronConnect
Introduction
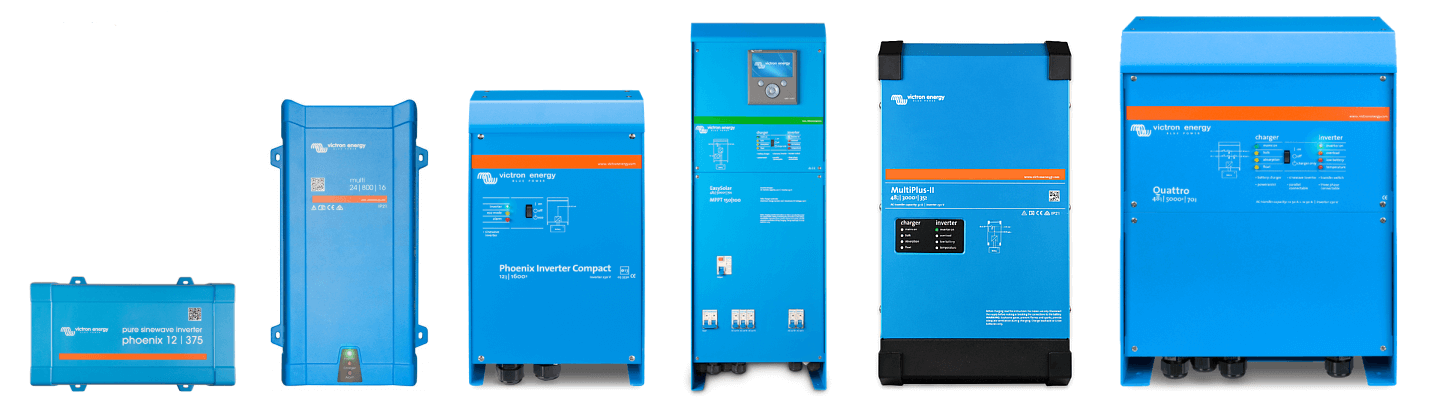
The MultiPlus lies at the heart of most off grid energy systems, and comprises of 3 pieces of equipment in a single unit; an inverter, charger and transfer switch. The MultiPlus is considered a professional piece of equipment, and needs to be programmed before use. The MultiPlus is also internally included as part of an EasyPlus or EasySolar. The Quattro is also very similar, and specifically has and extra "anti-islanding" relay and 2 AC inputs, which is great for a permanently connected backup generator!
Rather have us do it for you?
You can book a remote configuration through Roamer; all you need is your devices plugged into a GX device, with remote access enabled.
See more: Book your configuration
For this guide you will need:
Smartphone or Laptop with the VictronConnect app installed
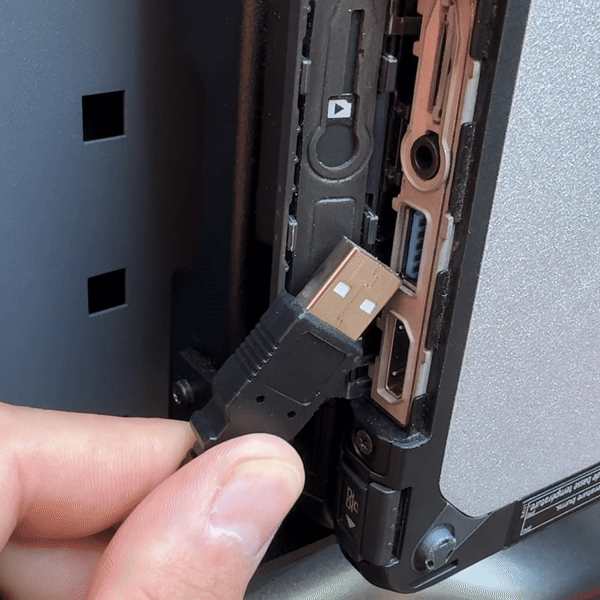
Victron MK3 to USB cable (a USB-C version is available too)
On-The-Go USB Adapter (if using a smartphone)
Standard RJ45/Ethernet cable
Your MultiPlus or EasyPlus (connected to your system and turned on)
For this guide, we'll be referring to the MultiPlus a lot, but its the same for the EasyPlus.
If there's anything different, we'll point it out.
Programming the MultiPlus:
Via the Victron Connect App:
Make sure the MultiPlus is turned off before connecting any cables.
Plug in the MK3 to USB cable to your device (using the On-The-Go adapter if you're using a smartphone).
Connect one end of the ethernet cable to the MK3 to USB "box" end.
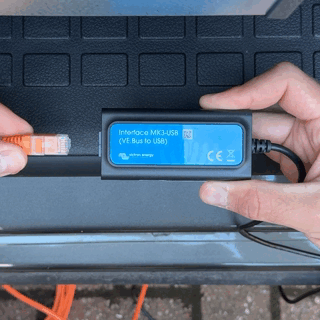
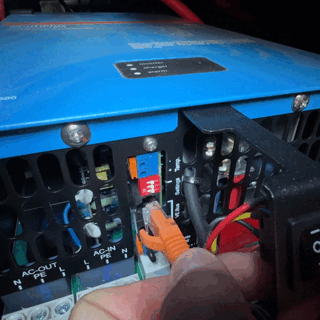
Connect the other end of the ethernet cable into one of the VE.Bus ports on the bottom of the MultiPlus.
Turn on the MultiPlus. (I on the switch, this it towards the front panel of the unit).
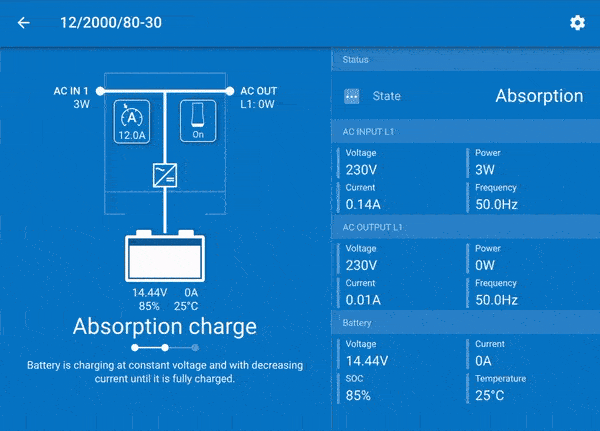
Open the VictronConnect app, and connect to your new MultiPlus in the Local Devices tab.
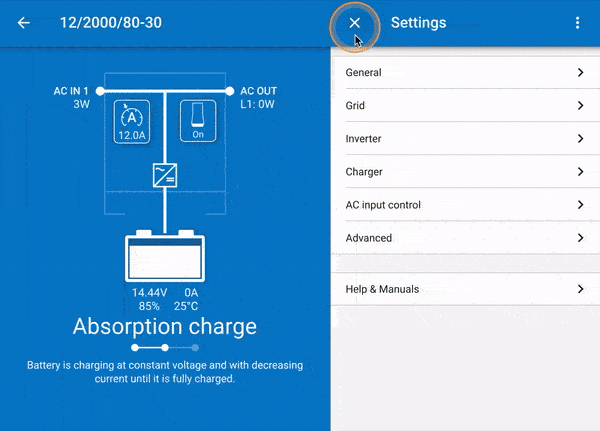
Click on the Settings icon in the top right.
You may be asked for a password, this is "zzz".
General:
Set the System frequency to 50Hz - you should not change this unless you are in a country that runs at a 60Hz grid frequency.
Set the AC1 input current limit to 10A.
You can change this later via a GX Device or a VE.Bus Smart Dongle.
This is to ensure you do not trip the circuit protection or blow a fuse when hooked up to a camp site/grid supply. This is equivalent to approx 2300w, more than enough for most applications, especially if you're running over a 25m EHU or extension lead.
Enable "Current limit overruled by remote" if you have a remote panel or GX Device with a Touch 50/70 fitted, or even if you're remotely monitoring via the VRM portal. Any of the kit in the image below.

Lastly, disable "Dynamic current limit" and disable "Enable battery monitor".
That last one might seem a bit confusing, but just make sure its turned off for now.
Grid:
Enable Accept wide input frequency range.
Disable UPS Function.
Set the AC low voltage disconnect to 180V.
Set the AC low voltage connect to 187V.
Set the AC high voltage connect to 265V.
Set the AC high voltage disconnect to 270V.

Grid code must remain BLANK, or set to NONE.
Do NOT set a grid code without specific authorisation by the DNO.
This is impossible with a mobile installation in a vehicle or vessel.
Inverter:
Set the Inverter output voltage to 230V.
Enable the Ground relay if not already.
Set DC input low-shutdown to 9.30V.
Set DC input low-restart to 10.90V.
Set DC input low pre-alarm to 10.90V.
Disable Low SOC shut-down.
Disable AES.

This reduces standby power consumption, but does mean that small loads may not "wake up" the inverter, so we like to keep this off, and simply remember to turn off the inverter if you're not using it for a while.
Enable PowerAssist.
Set the Assist current boost factor to 2.0.
This lets the MultiPlus take power form the battery if it needs it, when you're on a limited campsite/EHU supply.
For example, if a campsite has an EHU limit of 6.5A, then you should set your AC input current limit to this before connection to the campsite/EHU. PowerAssist allows the inverter to run up to 16A* to your 230V sockets, whilst using the maximum available power from the grid, and making up the shortfall from your batteries, up to a maximum assist of 100% of the incoming mains capacity.
*dependent on inverter capacity (VA), assumed maximum connection to inverter is 16A supply.
Charger:
Enable charger.
Charge current will determine the maximum current while in bulk stage of charging. We would recommend setting this slightly lower than the maximum possible on your Multiplus model - running it on max can be noisy. The exception is if your battery has a lower recommended max charge rate (see datasheet or manual). This may be as high as 230A, but could be as low as 50A for a single battery. If you are unsure, consult Roamer on support@roamer.com.
Tap on Battery preset and select "Smart Lithium LiFePO4" which is the Victron default for lithium and will work almost perfectly for Roamer batteries, we simply recommend you reduce the absorption time to 30-60 minutes instead of the default 2 hours and reduce storage voltage to 13.25V. Cable resistance can affect when the battery enters absorption mode and while 30 minutes absorption is usually sufficient to fully charge the battery, if you find that the battery is still accepting charge current at the end of the 30 minute period, you can increase this to 60 minutes. To make these changes, follow the steps below:
Set Absorption voltage to 14.2V.
Set the Float voltage to 13.5V.
Set the Repeated absorption interval to 7.00d.
Set the Repeated absorption time to 1.00h.
Set the Absorption time to 1h.
Disable the Low temperature cut-off.
Set the Charge curve to Fixed.
Enable Lithium batteries.
Disable Use equalisation.
NOTE: The Absorption voltage of 14.2V is correct for SMART, SMART2, SMART3 and SMART5 batteries. On SMART4 batteries however, the 100% calibration takes place when one cell reaches 3.60V - if cells are perfectly balanced then 14.2V might not be sufficient to reach this threshold. In this case, you can increase to 14.4V. It is also possible to (and perfectly safe) to change the calibration threshold in the BMS settings - if you wish to do this please contact support@roamer.com
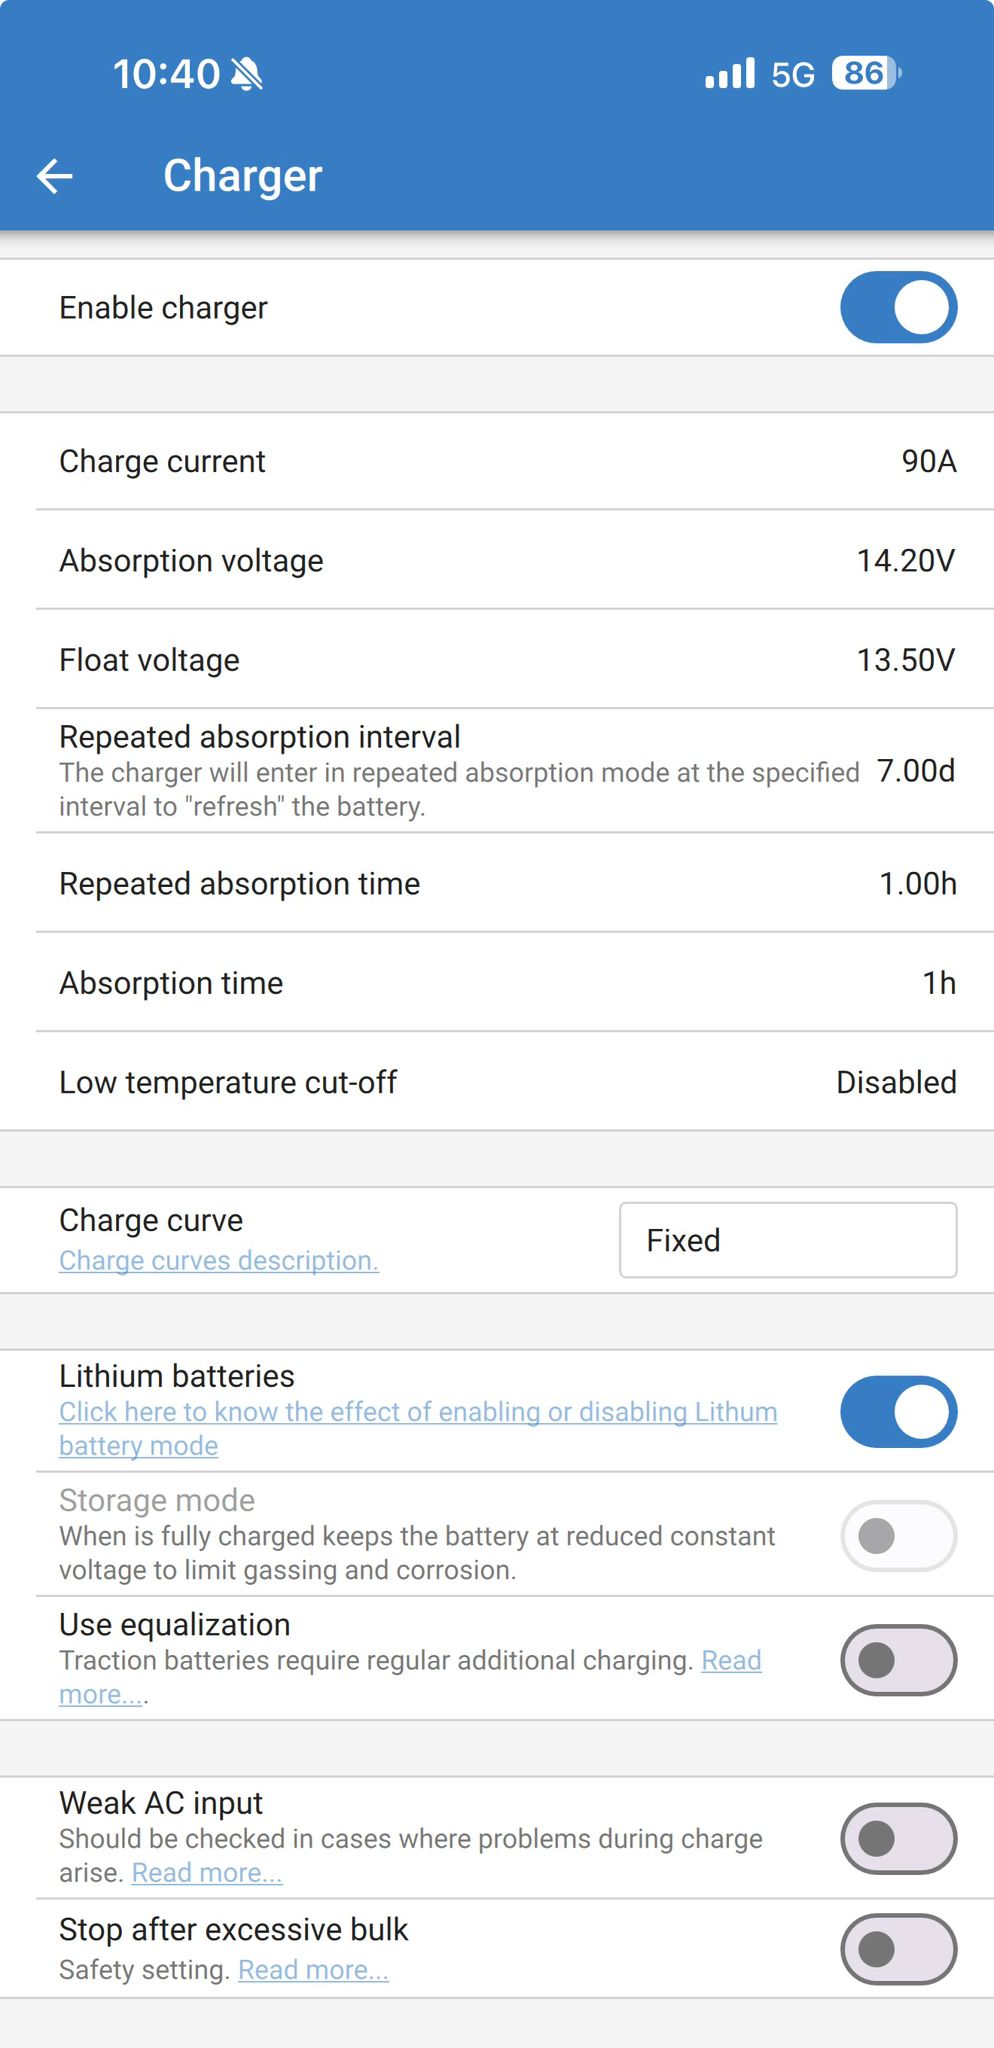
Weak AC input should be disabled in most cases.
Enable this feature if you are planning to use a generator at the AC input, as this will ramp up the load slowly, to avoid stalling a generator.
Disable Stop after excessive bulk.
AC input control & Advanced:

Leave this disabled (default), this is not required for any Roamer installation.
Feel free to contact Roamer support if you think you need to make use of this feature.
Leave the Prioritize other energy sources disabled (default), this is not normally required for any Roamer installation. Feel free to contact Roamer support if you think you need to make use of this feature.
Your MultiPlus is now configured - be sure to check all features, especially the charging from shore line (electric hook-up) so you're sure everything works before you head off on travels.
For any help or support, contact Roamer: support@roamer.com