
How to add your Roamer system with a GX device to the Victron VRM portal
This guide is based on the newest onscreen UI for the GX device range. If you're not using the latest onscreen UI, please follow our guide on how to update your GX device to the latest UI. You should also update to the latest Firmware before doing this setup. We have used Cerbo Firmware version 3.65 to create this guide so it might look slightly different depending on what version you are using.
DO NOT SKIP THROUGH ANY PART OF THIS GUIDE.
This guide will walk through setup of your GX Device (Ekrano GX, Cerbo GX - older models are not supported in this guide) so that it can be accessed via the Victron VRM portal for monitoring and configuration.
For this guide, you will need:
Cerbo GX or Ekrano GX (we refer to them all as GX devices)
Touch 50/70 Touchscreen (optional for the Cerbo GX)
A STABLE internet connection (WiFi, Phone Hotspot, GX LTE 4G or wired ethernet)
Setting up the GX device:
Setup with a Touch 50 / Touch 70 Display, or Ekrano GX:
Firstly please make sure all devices are correctly connected and switched on. If using a VE.Bus device such as a Multiplus, this must be wired to the VE.Bus port on the GX device.
When booted up, you'll be presented with the "brief" screen. Tap anywhere to bring up the bottom menu bar, and then tap on Settings in the bottom right.

Tap on VRM

Then press the back arrow when you're finished.
Tap on VRM online portal.
Tap on VRM portal.
Select "Full".
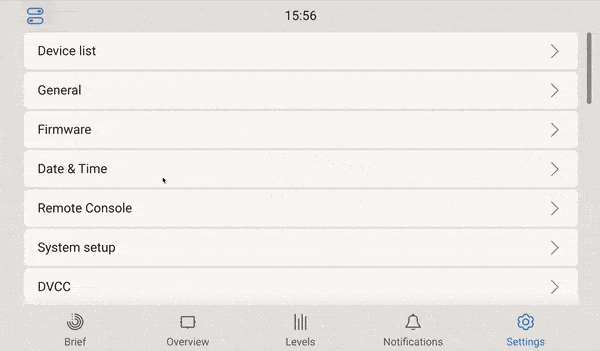
Then press the back arrow when you're finished.
Internet Connectivity:
WiFi
WiFi is often the simplest option. You can connect to WiFi via the touchscreen.
Scroll down the settings page and tap on Wi-Fi. (This could be your phone hotspot)
Tap on Wi-Fi networks.
Tap on the WiFi network that you wish to connect to.
Tap on the grey box in the password field and enter the password for the WiFi network.
NOTE: GX Devices only support 2.4GHz WiFi networks.
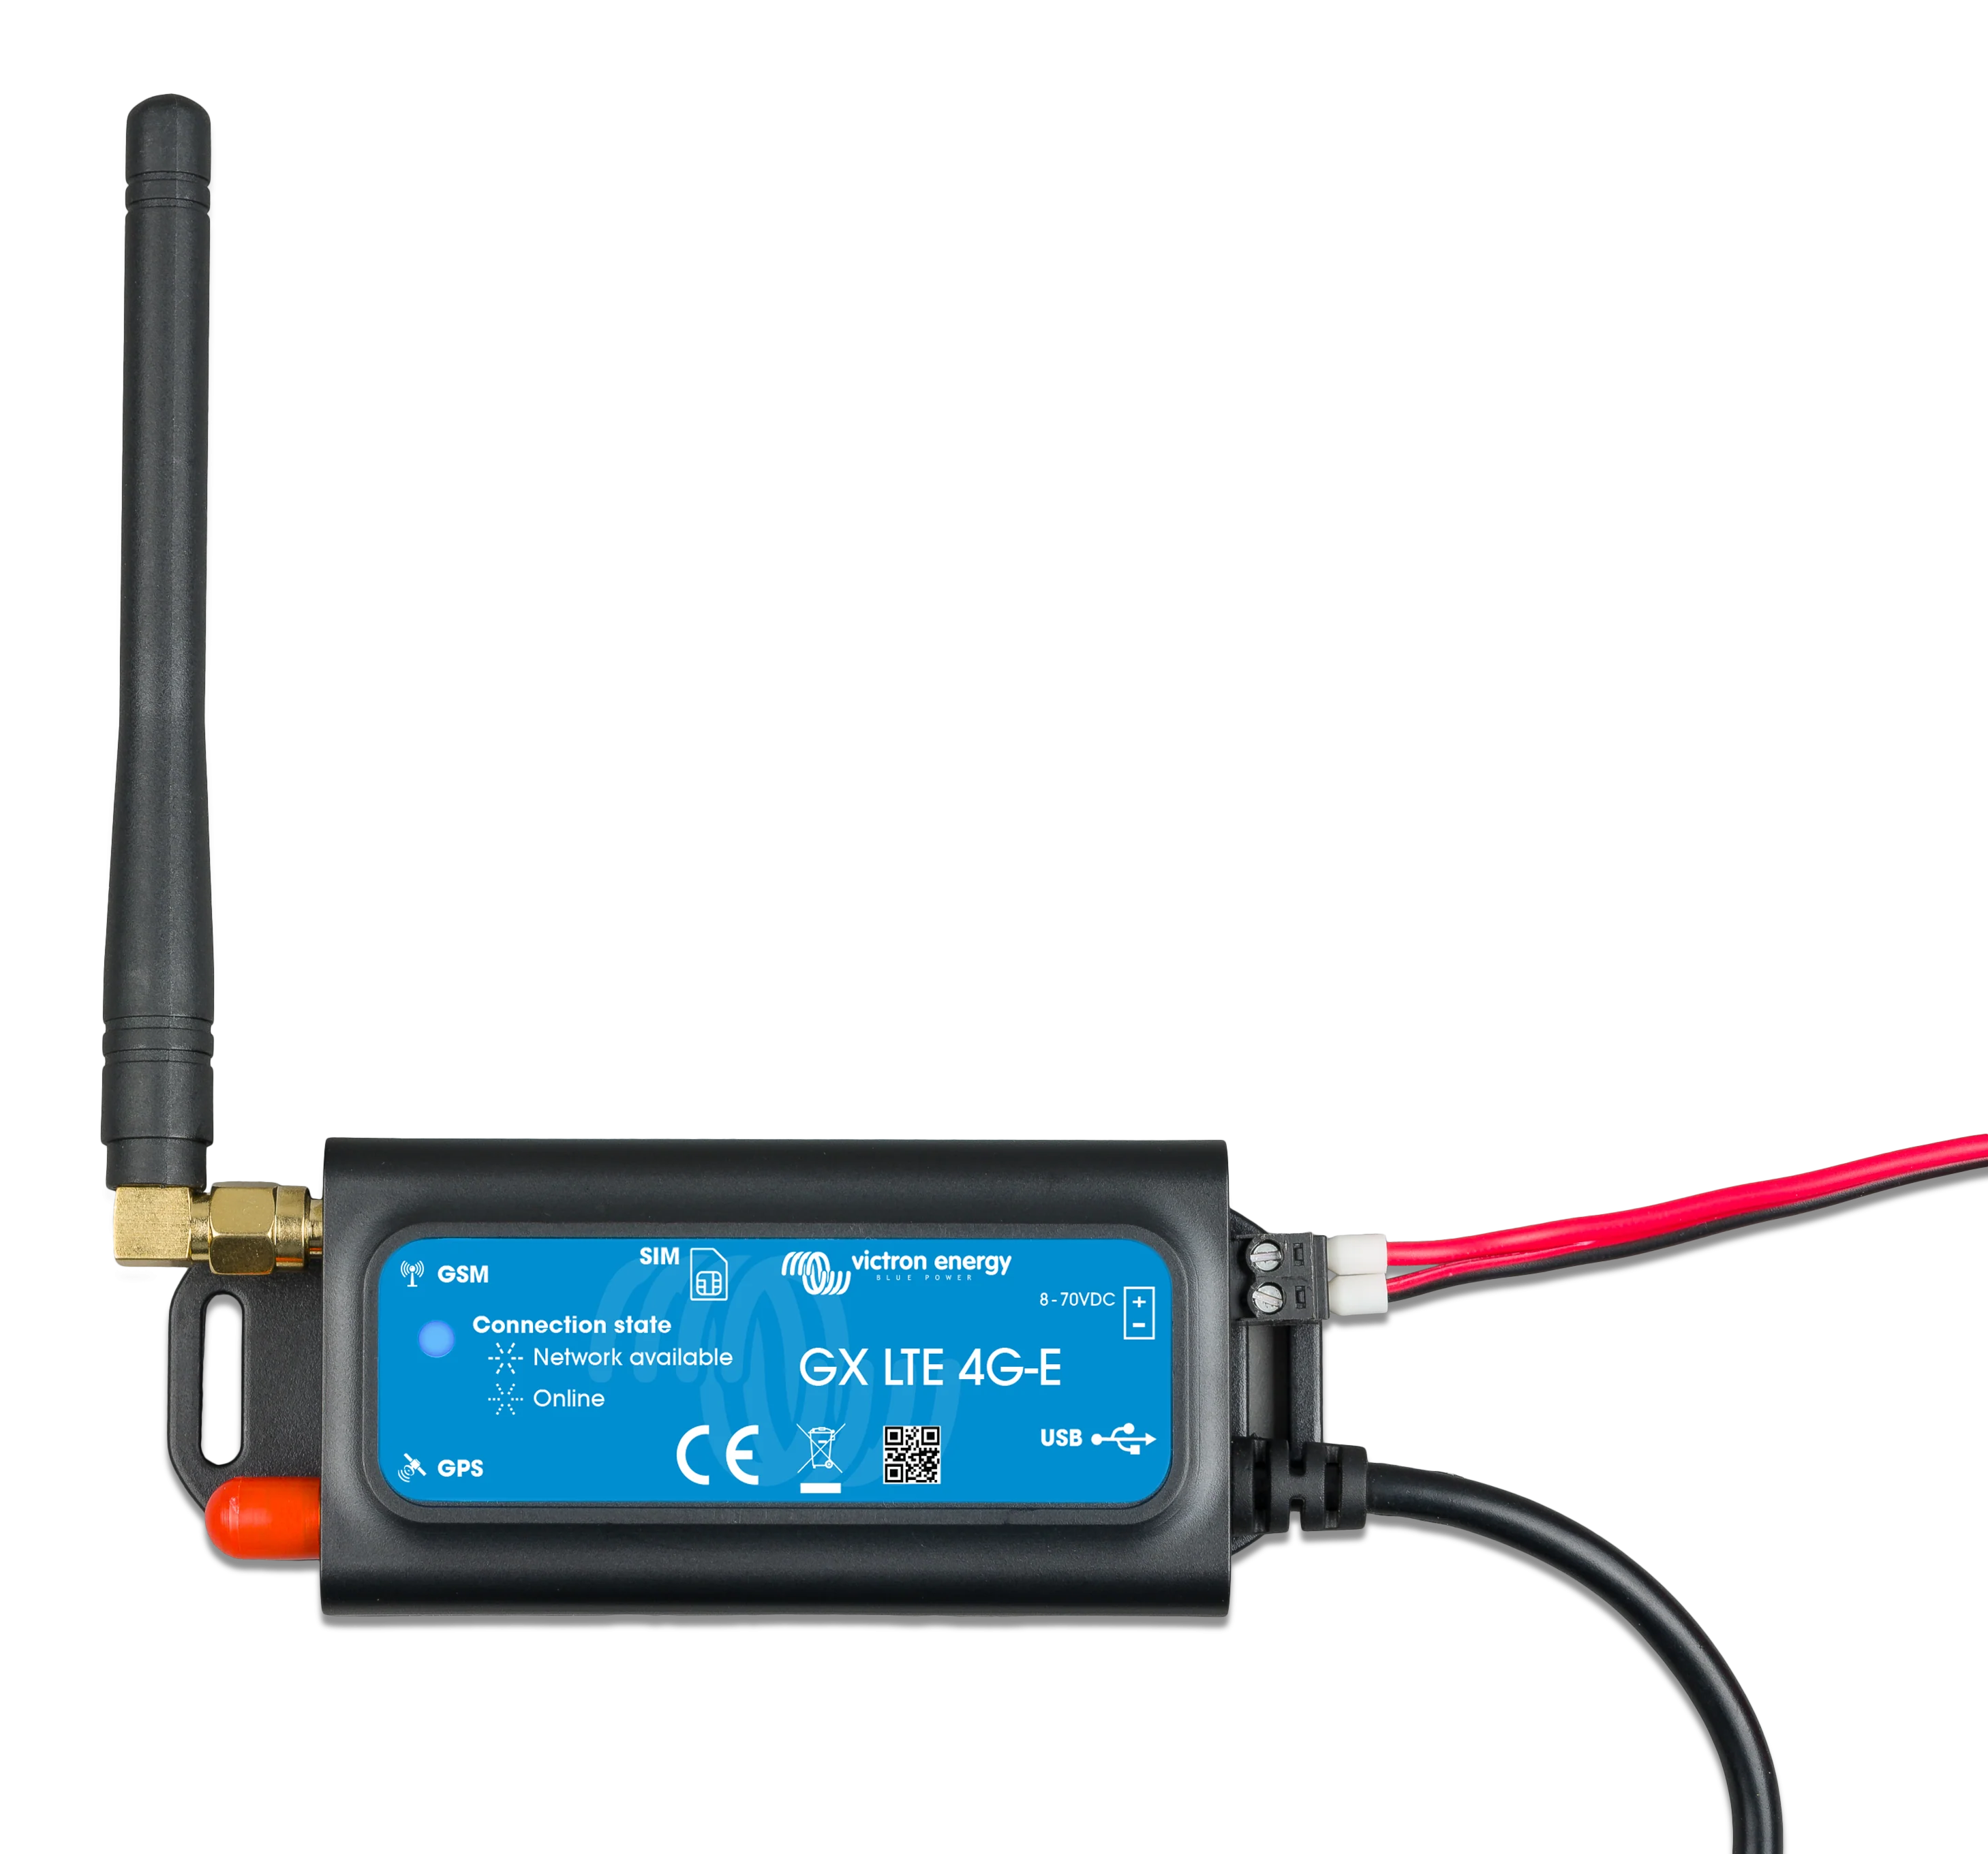
GX-LTE-4G
The Third option for an internet connection with GX Devices is the GX-LTE-4G.
Setup of this unit is fairly simple.
Attach the antenna to the GX-LTE-4G unit. The red cap should not be removed - this is for an optional GPS antenna.
Insert a SIM card into the SIM tray.
Connect the USB cable to an empty port on your GX device.
Plug in the power cable and connect the red and black ring terminals to your battery, or the same power supply as the GX device.
Next, we need to go into the Settings on the GX device and pop in our APN settings.
In the Settings menu, scroll down and tap on GSM modem.
Now scroll down and tap on the grey box next to APN, then tap on APN name.
Enter the APN setting for your SIM card.
If your SIM card needs an APN Username and Password, press the back arrow once and then toggle the setting called Use Authentication.
Enter the Username and Password in the boxes that appear.
VRM Account Setup
This is the last bit. We now need you to create an account in VRM so you can access your system.
We then ask you to add Roamer to this, so we can also access it in order to program the rest of the system for you.
Firstly, go to vrm.victronenergy.com and sign up for an account.
Once signed in, click on Add Installation.
Select your device type, and enter the VRM Portal ID that we saw in VRM online portal page in the settings.
Click on Connect and you're setup.
Adding Roamer as a user
Now finally we just need to add Roamer as a user, so we can gain full access for the configuration.
Go to Installations on the left hand side of your screen, and select the name you gave your installation, or the VRM Portal ID of your installation if you chose not to name it.
Next, click on Settings and then Users.
Click on Invite user on the right of the screen.
Enter the details below. Please ensure access level is Technician or Admin, as this is crucial.
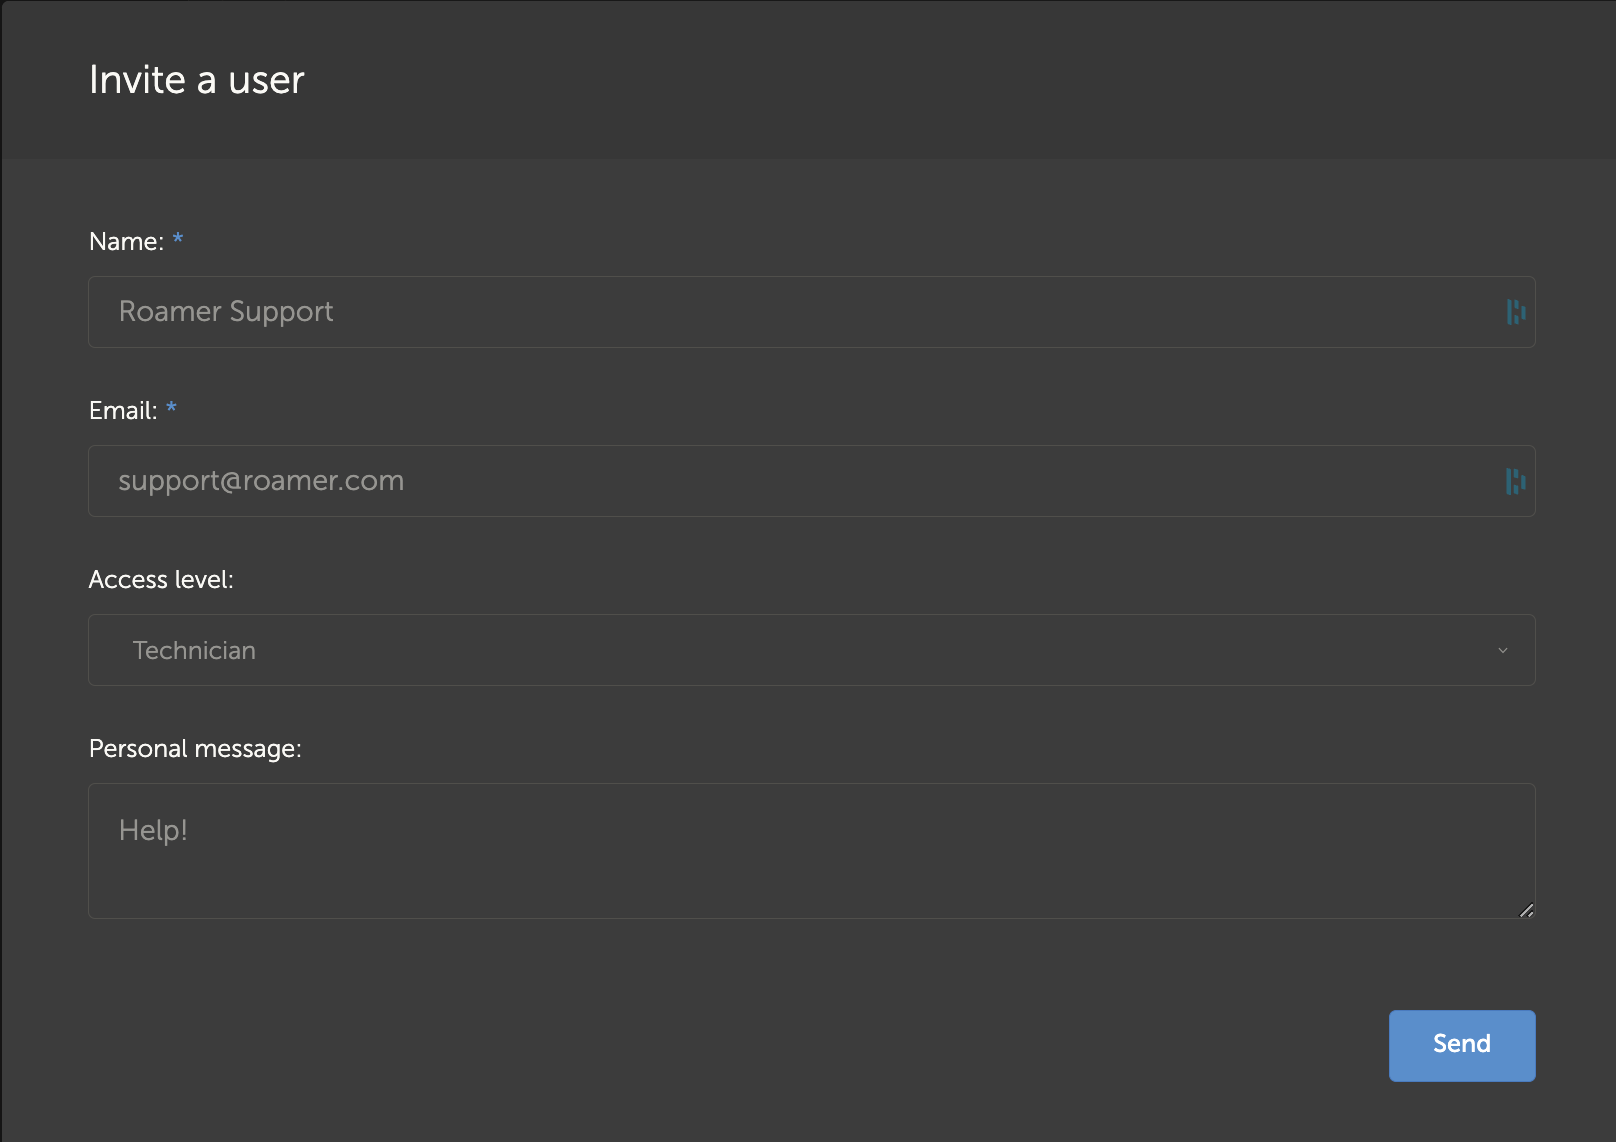
Click on Send.
The setup is now complete and ready for remote configuration.
Book this in via the link provided by Roamer if this was included on your Electrical System invoice.
Otherwise, please book here: Book your configuration