
Setting up DVCC on a Victron GX device for use with a Roamer SMART4 battery
Victron’s DVCC (Distributed Voltage and Current Control) is a powerful feature that intelligently manages charge and discharge limits across your Victron system, helping to optimise performance, protect your batteries, and ensure reliable operation - especially in systems with SMART4/5 or HOME batteries, or multiple charging sources. It acts as a central hub for system wide battery control. In the guide below, we’ll walk you through how to get DVCC set up correctly, so you can take full advantage of its features.
Before you start
Make sure you have the following:
Victron GX Device (Cerbo/Ekrano etc)
Roamer SMART4/5 or HOME batteries connected via CANbus (click to see how to connect and set this up first)
Touchscreen control of Victron GX device, or access via VRM Remote Console
Your system's connected chargers must be setup correctly for standalone operation before using DVCC - this is a safety measure in case of loss of communicaton and subsequent system reset, leading to the internal charge algorithm being used.
Do not proceed if your chargers are not already correctly configured.
Where do I find the settings?
Within VRM, go to the side menu of your installation and select "Remote Console".
If you are physically local to the installation, and have a touchscreen attached, you can skip this step.

You should be greeted with a console, which displays the system power.
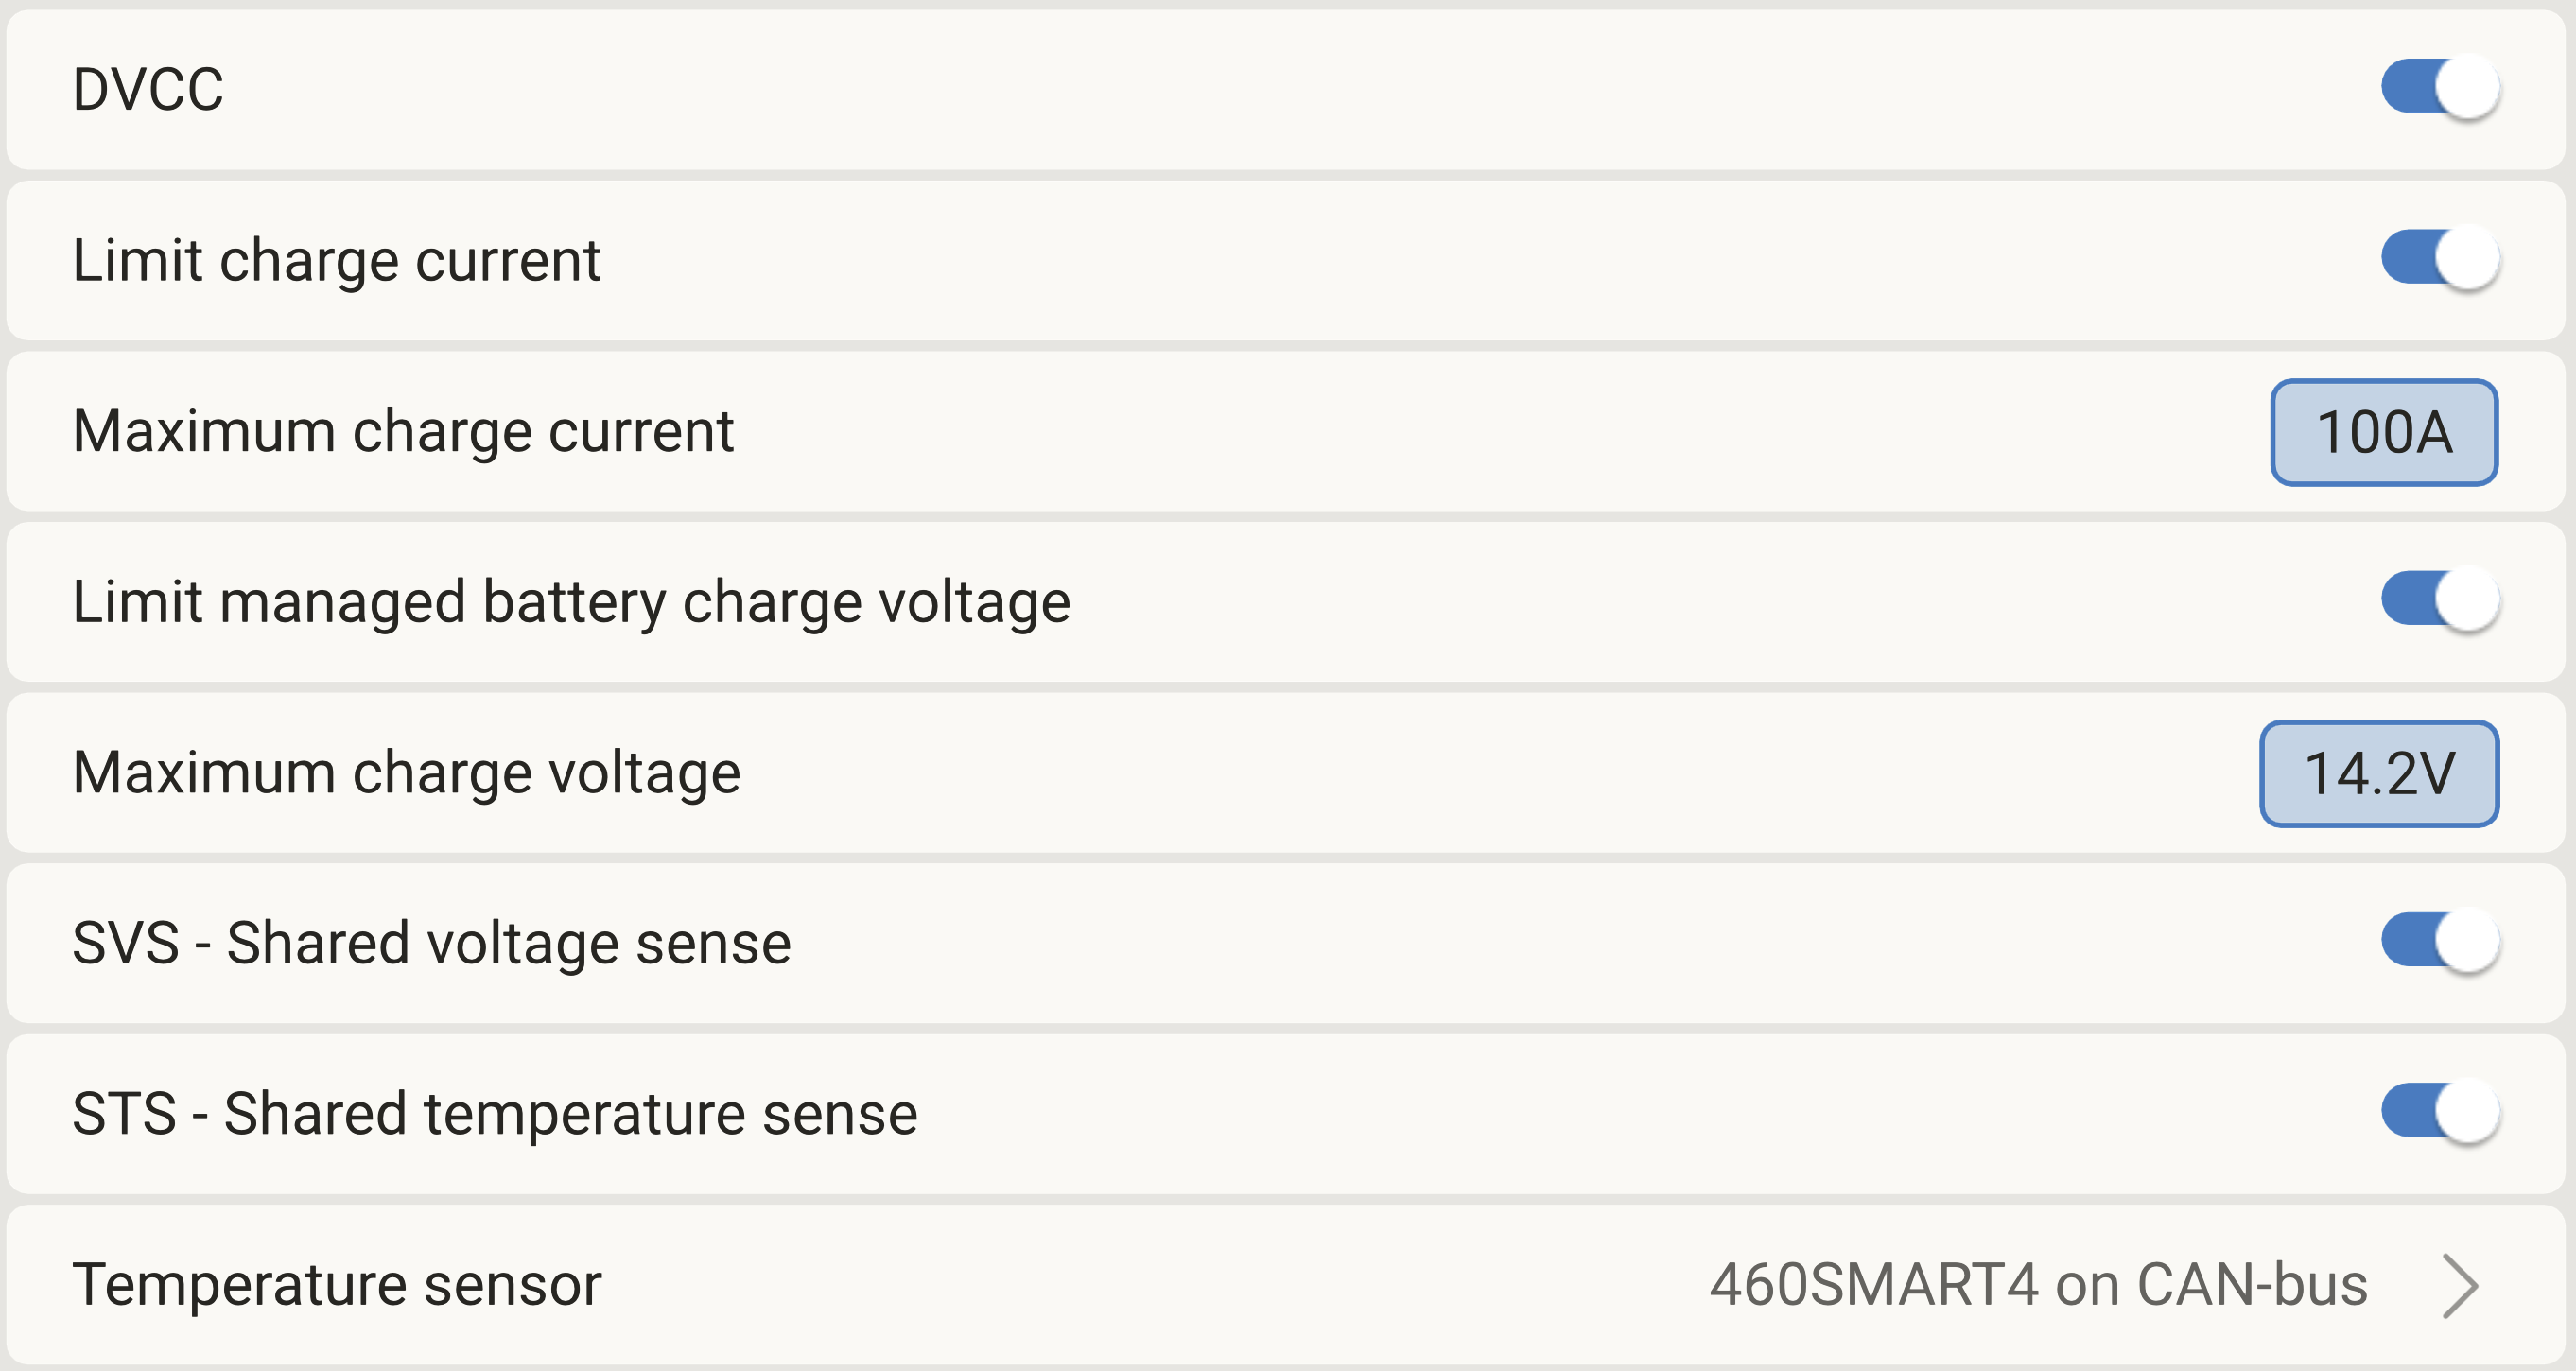
Go to Settings > System Setup > Charge Control to get to the DVCC parameters.
Apply the following settings:
We recommend a Charge Current Limit (CCL) at a value up to 50% of your battery capacity (or the BMS limit if this is lower). For example, if you have a 12V 460Ah battery, you can use up to 230A CCL. These are maximum values, it’s ok to use lower values if you want to reduce the load on your batteries.
Your Charge Voltage Limit (CVL) should be set to the recommended absorption charge voltage of your battery, for example with a 12V battery, you would set this to 14.2V.
High Cell Voltage warnings are common on new installations and as long as your settings are correct, it’s nothing to worry about - this is a result of the "cell max (charge to) voltage" voltage within the BMS being interpreted as a "cell high voltage" by the Victron GX device. Roamer's recommended charge voltage (for 12V batteries) is 14.2V (average of 3.55V per cell) and the cell max voltage setting in the BMS is 3.7V which leaves very little room for imbalance. The Active Balancer will refine this over a few cycles but in the meantime, you can simply drop the DVCC maximum charge voltage setting and the alarms will stop.
Alternative use cases for DVCC?
Having global control of all connected chargers has obvious advantages but there are some other less obvious use cases too. For example if you want to put all chargers into a temporary storage mode (to prevent holding the battery bank at the float voltage for long periods) then all you need to do is drop the 'Maximum Charge voltage' setting to a lower value eg 13.3V (for a 12V battery). There are also advanced programming options using Node Red that allow you to set these values according to specific conditions, for example you could reduce the maximum charge current according to temperature. The possibilities are endless, if you discover a new use case then please share with us at support@roamer.com we'd love to hear about it!
Final Note
If you disable DVCC or turn off the batteries in the future, you may see errors - you will need to reset the external control for any MPPTs, and restart the VE.Bus system on any MultiPlus units. This can be done via the GX device console.
For any help or support, contact Roamer: support@roamer.com